• 16 Jun

    Our shop is open to the public – one day only!

    Posted under News

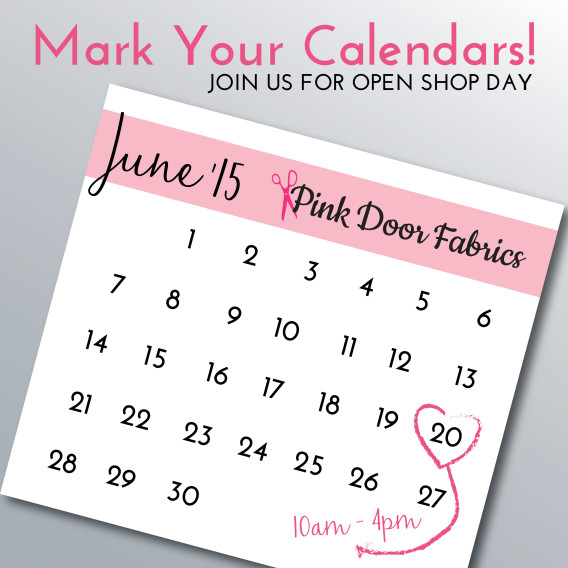
    Calendar-01

    Open Shop Day THIS Saturday, June 20th!

    Mark your calendars! We are having our first ever Open Shop Day. We are not regularly open to the public but we’ve decided to give it a go! If you’re local to Denver, or even on the front range, you’ll definitely want to join us for a fun-filled day of giveaways, raffles, and shopping!

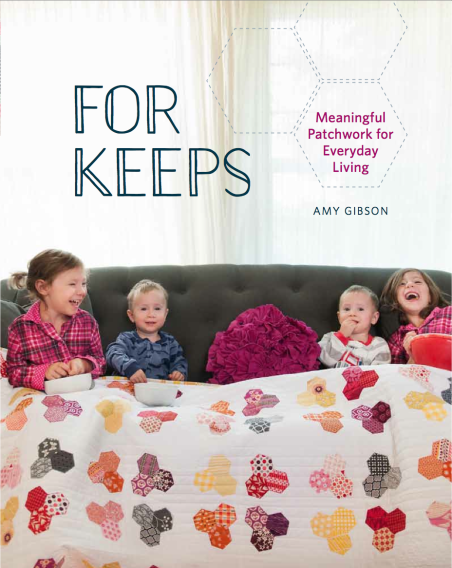
    You’ll find over 1,000 bolts of fabrics, patterns and notions, as well as a new clearance section! We’ll even do a meet and greet with Amy Gibson, author of For Keeps, from 12 noon to 2pm. She’ll be there to sign books and meet you all!

    For Keeps Cover

    1d6f1633-2636-413d-9eea-e1894ddacd5e

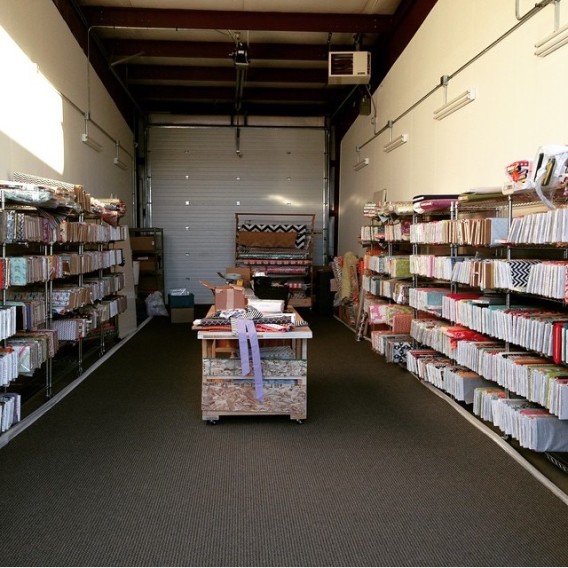
    As you can see, we’re a bare-bones warehouse. We’d love to meet you and you can pet all the fabric your little heart desires! We are located at 7100 Miller Place, Frederick, CO, Unit B-4, just a few miles north of Denver. Once you get on location, there will be pink balloons to lead the way! Please try not to block and other unit entry doors; you can park along the street!

    Please note: there are no restrooms (except a very clean port-a-potty), but there is a gas station and Starbucks on the way, about 5 minutes south at the intersection of Hwy 52 and I-25 on the West side of I-25.

    Exit I-25, and head East on Hwy 52. Turn left onto E I-25 Frontage Road (the first light you’ll reach from I-25), and follow that for about 2 miles. Then turn right onto Commerce Court which then turns into Commerce Drive. Turn left onto Miller Drive and then left onto Miller Place. Head back toward the warehouse buildings and follow the pink balloons. You won’t be able to miss it!

    We sure hope to see each and every one of you there!

    Also – please note – we won’t have cash for change, but we take credit card or we can immediately invoice you through Paypal. :)

    One comment »

    05 Jun

    The Collection Quilt – by Carolyn Friedlander

    Posted under News

    Photo Credit: Carolyn Friendlander

    Photo Credit: Carolyn Friendlander

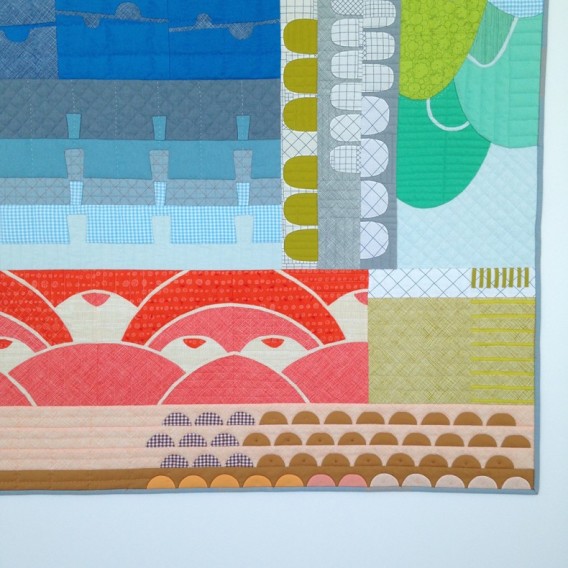
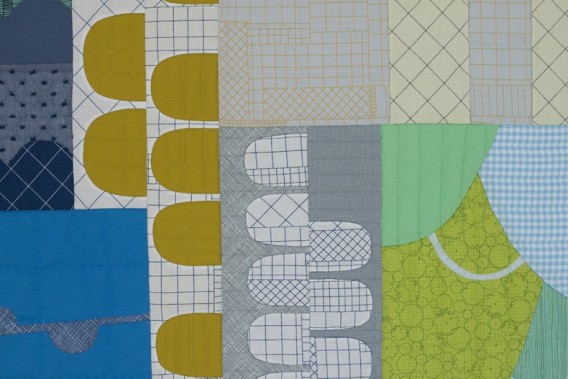
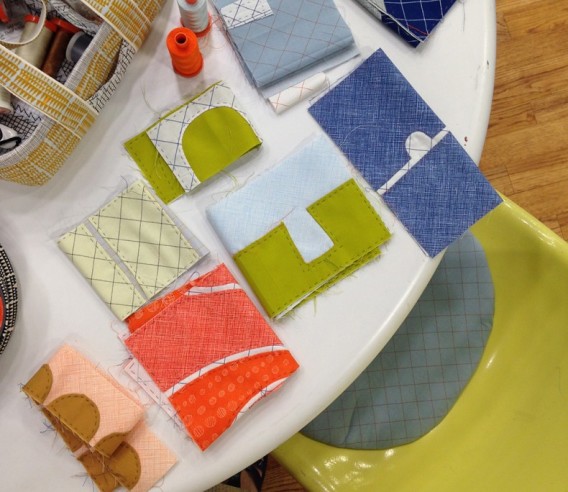
    While we were at Quilt Market last month, we stumbled upon this absolutely stunning Collection Quilt by Carolyn Friendlander. After speaking more with Carolyn about her Collection Quilt pattern, we found out this a beginner to intermediate pattern, with the goal of starting with easier blocks, and working toward more intricate and complex blocks. This sounds like the perfect skill-builder in needle turn appliqué! The entire quilt is hand pieced, and then the quilt blocks are joined together by machine when done. You have the option of needle turn appliqué, or raw edge appliqué, whichever you prefer.

    Photo Credit: Carolyn Friedlander

    Photo Credit: Carolyn Friedlander

    We jumped on ordering the Collection Quilt pattern, and we do have those individually in the shop. To take it one step further, we are kitting each month and offering those as part of a subscription! The individual Collection Quilt pattern is $42, but if you purchase it with the BOM kit, it’s $39, and we do all the hard work for you! We cut and ship the fabrics required for each month of the Collection Quilt. Some months, you’ll get just a few 1/4 yards, and other months, you’ll get more. The entire Collection Quilt BOM program lasts 10 months, and in the final month, you’ll receive the backing and binding of your choice. That’s an ENTIRE quilt shipped to your door! (If you’re international and are considering the BOM subscription, please contact us. We are happy to hold your order for 2-3 months to reduce shipping charges.) You’ll only need to add batting, and collect the supplies needed.

    Collection is a 9-part series focused on exploring shape and color. Each “Collection” (or part of the project) is broken down by skill. For example, in Collection #1 you’ll be able to get the hang of the basic process before I start throwing any crazy shapes at you. Each following Collection will focus on another appliqué variation through illustrations, photographs and diagrams. – Carolyn Friedlander

    There are also 6 alternate projects included that are made from blocks in the project. Additional items recommended: Thread (coordinating and contrasting colors), applique needles, applique pins, large fabric scissors, applique scissors or small fabric scissors, removable marking tool, seam gauge, iron, card stock or template plastic, rotary cutter, cutting mat and rulers.

    Photo Credit: Carolyn Friedlander

    Photo Credit: Carolyn Friedlander

    Need another reason to sign up?? Check out these benefits of hand sewing!

    Some benefits of hand sewing:
    1. Hand piecing/sewing is simple and inexpensive. There is no need to buy an expensive sewing machine! Templates are used repeatedly and can be made out of household items, like freezer paper and cereal boxes. The only items that are truly needed for hand piecing? Fabric, scissors, templates, pins, needles, thread, and thimbles.
    2. Portability. You can hand piece anywhere! Pack up your hand work and bring it along with you. You can sew in the car, waiting rooms, hotels, sporting events, or in your backyard.
    3. Precision. Hand piecing is highly controlled and very forgiving. Matching seams and perfect points are easily attained! Complicated blocks with tricky seams and plenty of pieces are finished accurately with hand piecing.
    4. Relaxation. There is something therapeutic about working quietly with your hands. Many people like to sit on their couch and hand sew while watching TV. It is also a nice time to socialize. It is a quiet craft, so it makes for a nice project to work on when talking with friends.

    Are you going to join us in the Collection Quilt BOM?

    tags: , , , , ,

    No Comments »

    15 Apr

    The Curvy Clutch – A Free Pattern and Tutorial

    Posted under Free Patterns, New Fabrics, News, Tutorials, WIP Wednesday

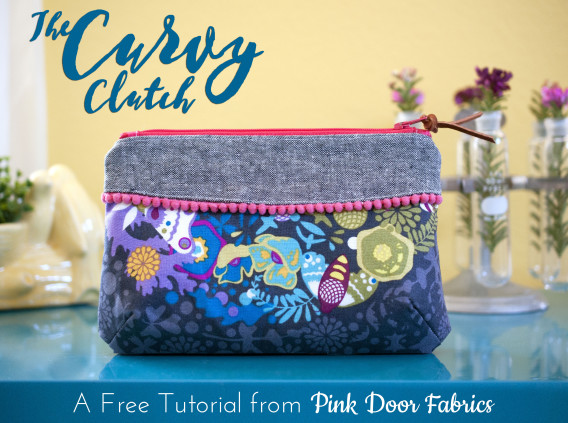
    DSC_0142_Blog

    Over the last few days, an idea has been bouncing around and I quickly set to work. I sketched ideas, drew up templates, and quickly got down to sewing. We were given some advance sample fabric of Alison Glass‘ new line, Ex Libris, and oh my goodness, it’s gorgeous! We expect to see it in our shop very, very soon!

    On with the post – I’ve written up a tutorial for the Curvy Clutch to share with you all! We love to create, and know that many of you do, as well. So here we go!

    Download your own copy of the Curvy Clutch pattern and tutorial here.
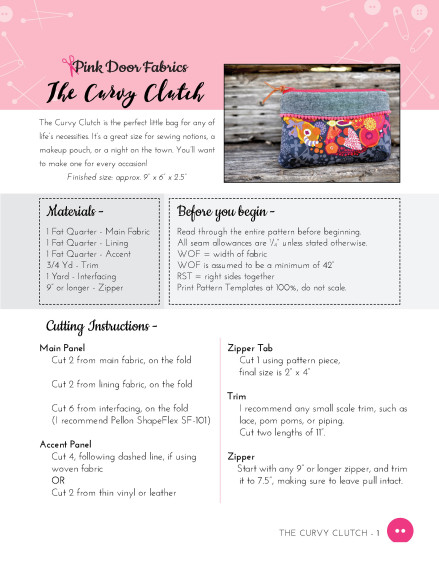
    Pink Door Fabrics - The Curvy Clutch Tutorial and Pattern

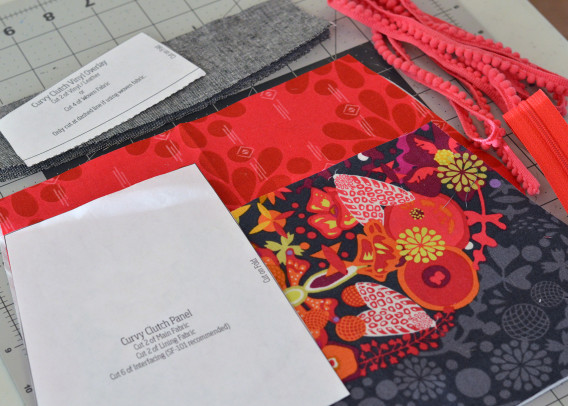
    Let’s begin on your Curvy Clutch! You only need a Fat Quarter of all three fabrics used. You’ll also need some trim (3/4 Yard), a 9″ or longer zipper, and a yard of interfacing. I recommend Pellon Shapeflex SF-101.
    The Curvy Clutch Tutorial and Pattern

    1. Cut all your pattern pieces for the Curvy Clutch as directed on the templates. Trim your zipper to 7″ in total length. Be sure not to cut off the pull.

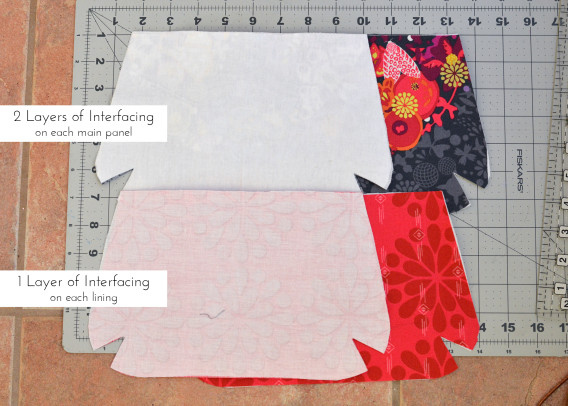
    2. Take two pieces of your interfacing, making sure rough side facing up, and layer with under one main panel. Follow manufacturere’s directions for fusing. Repeat for other main panel. Fuse one piece of interfacing to each lining piece, following manufacturer’s directions. Set aside.
    The Curvy Clutch Tutorial and Pattern

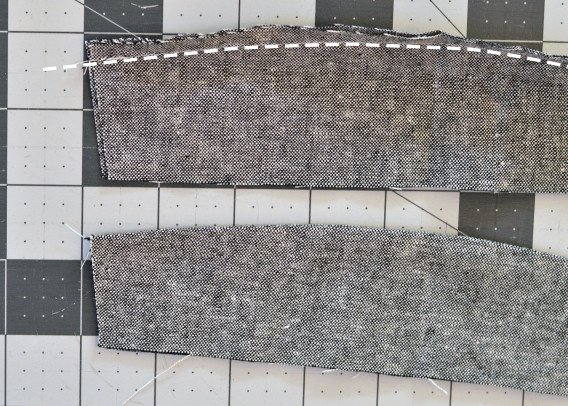
    3. Take your accent pieces, and put them RST. Using a 1/4” seam allowance, sew along the curved edge, backstitching at both ends. Turn and fold the pieces, right sides now on the outside, and press carefully. Don’t stretch the fabric while pressing. If you’re using vinyl or leather, there will be no sewing on this step. Proceed to the next step.
    The Curvy Clutch Tutorial and Pattern

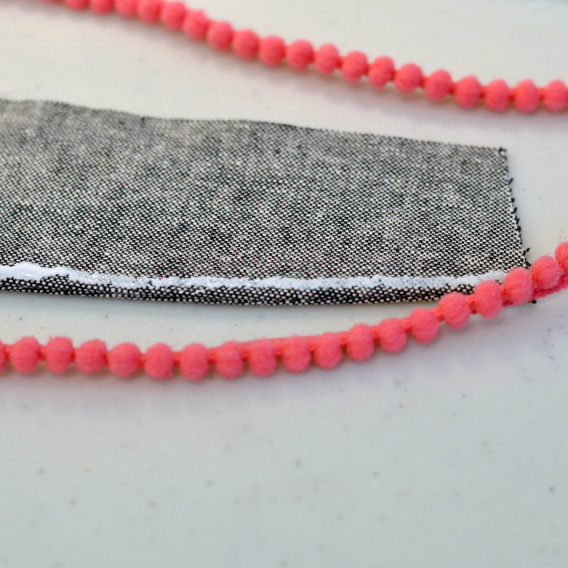
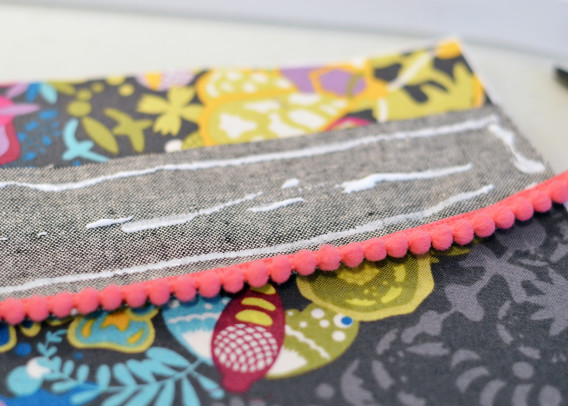
    4. Take your accent pieces and your trim, and then apply a thin layer of glue to the wrong side of your accent piece on the sewn edge. You’ll need to make sure your trim stays in place so hand press the trim well.
    The Curvy Clutch Pattern and Tutorial

    5. Once your trim is adhered, go ahead and apply some glue to the wrong side of the accent piece.

    Alternately, you can lay the accent piece on the main panel, aligning top edges, and pin well. I don’t recommend pinning if you’re using vinyl or leather, as it will leave permanent holes.
    The Curvy Clutch Pattern and Tutorial

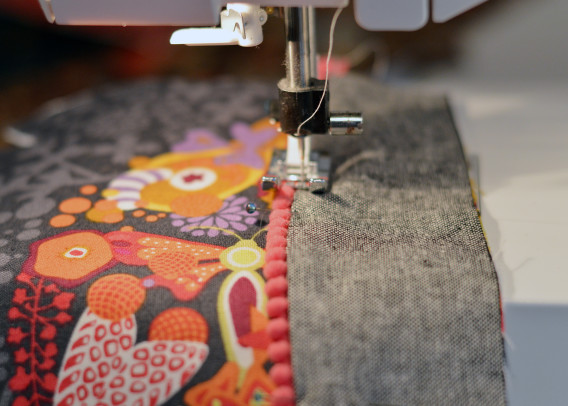
    6. Now, very carefully as not to snag and pull your trim, topstitch 1/8” from the edge of the accent piece to secure the accent piece and trim to your main panel. Sew around all four edges. Set aside.
    The Curvy Clutch Pattern and Tutorial

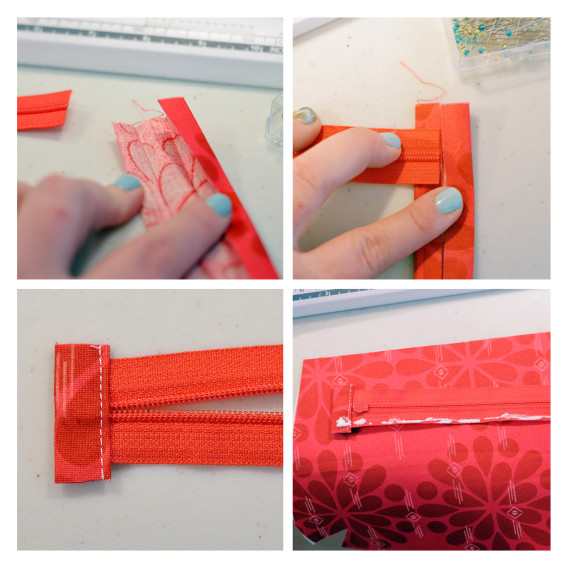
    7. Grab your zipper tab, and iron it in half, lengthwise. You should have tab that now measures 1” wide by 4” long. Open it and fold the outside edges to the middle. Press again. It will look similar to bias tape. Once pressed, open and insert your trimmed zipper edge, aligning it with the middle of the tab. Topstitch this tab, and trim leaving 1/8” extending past zipper. Repeat for other side of zipper.

    With your zipper pull on the left side (for now), apply a thin layer of glue to zipper edge, on the bottom of the zipper.
    The Curvy Clutch Pattern and Tutorial

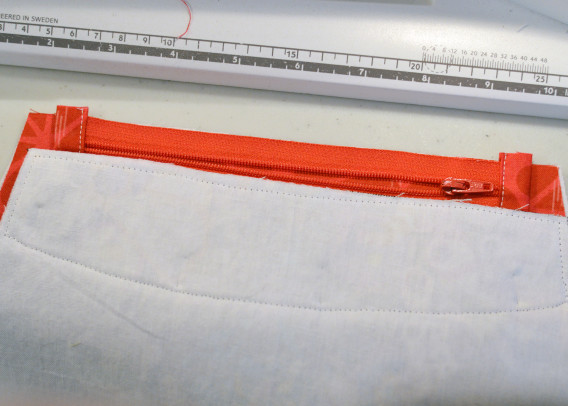
    8. Center your zipper on the right side of the back lining panel. Hand press to adhere zipper. This will help keep zipper in place. Place your back main panel right side down, centered on the zipper, and aligning top edges.. Pin well.

    Note that the zipper pull is still on the left side. In the picture, my zipper is open so that I can easily sew this seam. Sew with a 1/4” seam allowance to finish making the back of your clutch.
    The Curvy Clutch Pattern and Tutorial

    9. Press both the lining and main panels away from the zipper, and topstitch the edge as shown. I use a 1/8” seam allowance for topstitching.
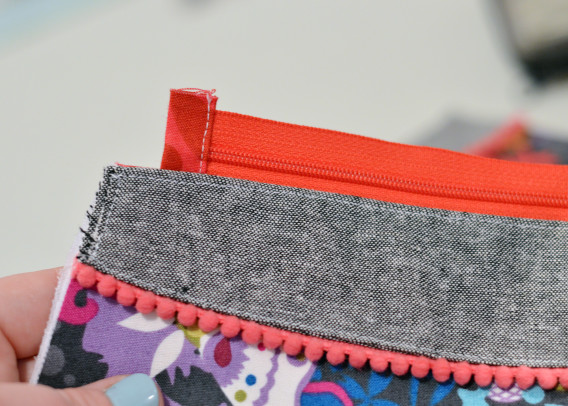
    The Curvy Clutch Pattern and Tutorial

    10. Repeat steps 7 and 8 for the front main panel and lining of the clutch.
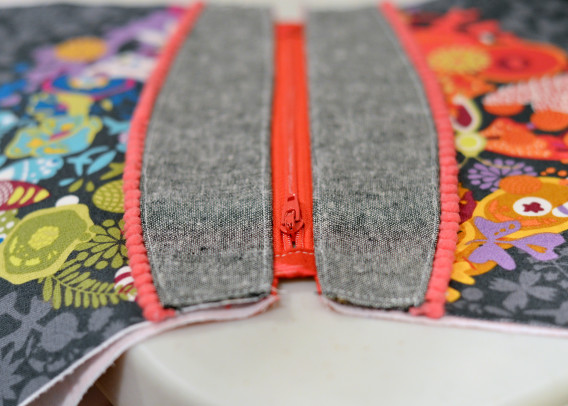
    The Curvy Clutch Pattern and Tutorial

    11. In this step, you’ll sew together the darts, which create the curved bottom. Fold your main and lining panels RST and sew with a 1/4” seam allowance. Press seams toward the middle of the pouch.
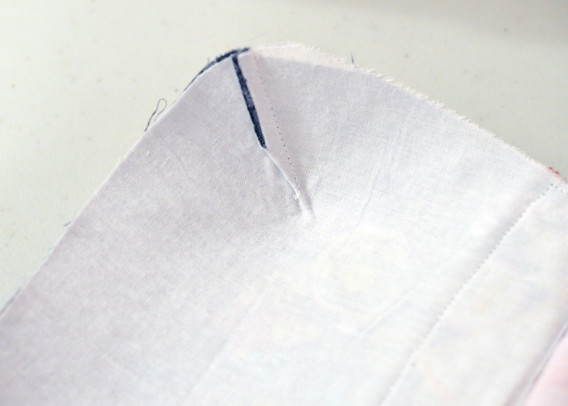
    The Curvy Clutch Pattern and Tutorial

    12. OPEN YOUR ZIPPER!

    OPEN YOUR ZIPPER!

    DON’T FORGET TO OPEN YOUR ZIPPER!

    Align your two main panels RST. Align your lining panels RST. Pin well. Leaving a 4” opening on the bottom edge of the lining, begin sewing your clutch together. Go slowly over the seams and when you get back to the lining opening, backstitch several times to reinforce.
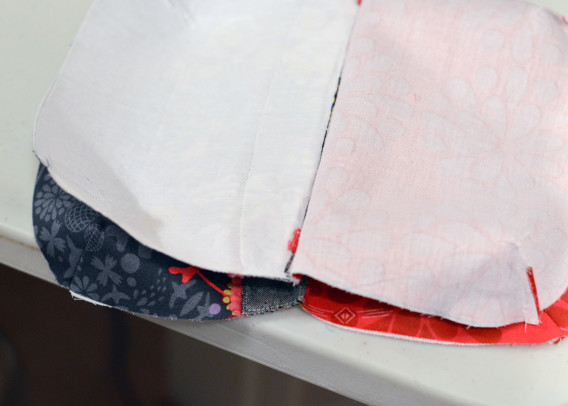
    The Curvy Clutch Pattern and Tutorial

    13. Using the lining opening, reach into the hole and through the open zipper, turn your pouch right side out. While the lining is still out, sew the opening closed either by hand, or machine.
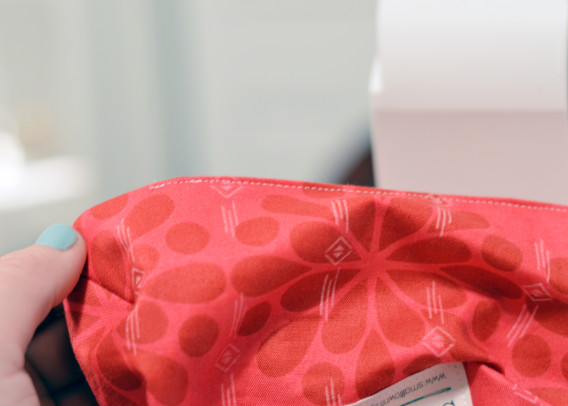
    The Curvy Clutch Pattern and Tutorial

    14. Push the lining back into the clutch, and press well. If you have used leather or vinyl, please don’t use the hottest setting on your iron as it will damage your clutch.  That’s it! You’ve completed your Curvy Clutch.

    Share photos on Instagram using #TheCurvyClutch and #SewingWithPinkDoor
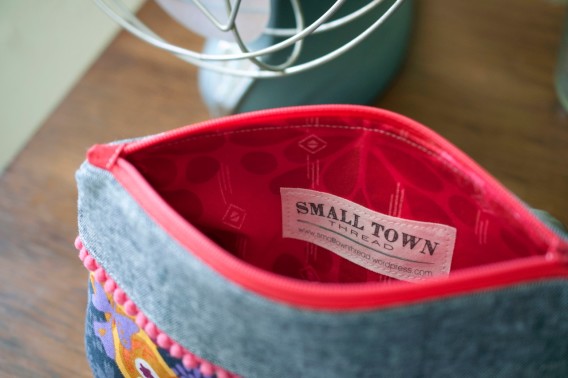
    The Curvy Clutch Pattern and Tutorial

    15 Comments »

    08 Apr

    Sewing for Boys – Tutorial Round Up!

    Posted under News, Sewing Tips and Tricks, Tutorials

    Let me start off by saying, I don’t have boys. I have two precious little girls who prefer all manner of pink and purple and glitter and sparkle. My youngest girl is pretty tomboy and not afraid of anything! I have to admit – I’m not the most girly-girl so I’m sometimes a little envious of the moms who can sew for boys. There is a market for boys’ items (albeit, smaller) and it’s amazing! There are tutorials and patterns, everywhere! I am compiling some of my favorite “sewing for boys” tutorials and patterns here, and I will mention, even my girls were quite excited about some of these! I’m quite excited about this Sewing for Boys post! Here we go!

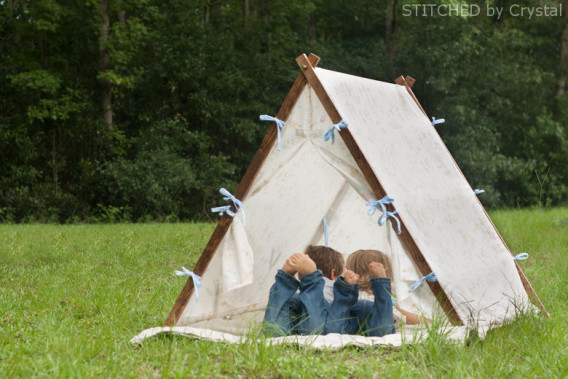
    1. Collapsible Play Tent
    Collapsible Play Tent - DIY Sewing for BoysIs this not the most amazing tent!? I kind of want one for myself! You can find the tutorial to create your own little wonderland for your mini-me’s at Make It Love It.

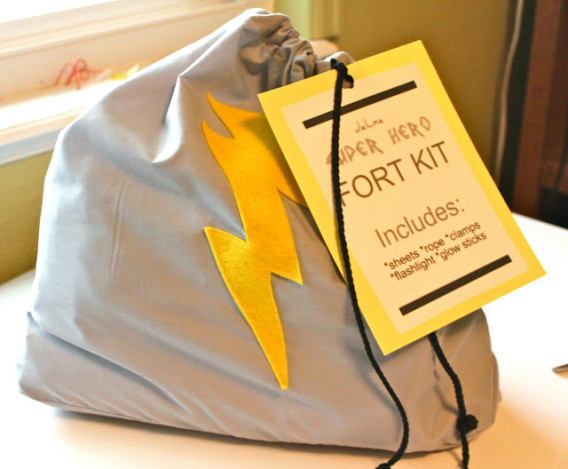
    2. Super Hero Fort Kit

    DIY Super Hero Fort Kit - Sewing for Boys

    If your little guy (or girl) would prefer to build their own tent, this is perfect! You give them all the supplies, tucked neatly into a customized bag, and let them build it themselves! This really is a great skill, and a lot of fun for everyone! You can find the info at Meg + Andy! Sewing for boys is looking more and more fun!

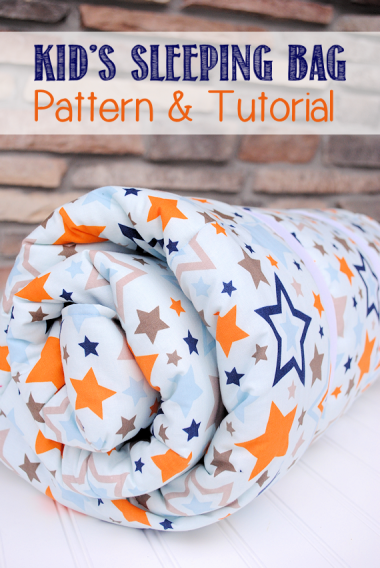
    3. Sleeping Bag, while we’re camping and all…
    Kid Sleeping Bag - Sewing for Boys

    Since we’ve discussed two ways of making tents, and with summer coming up, I figured I’d add in a tutorial for a kid size sleeping bag! Again, this works for boys and girls, and can be customized any way you’d like! You could even use flat bed sheets for the fabric, too! I think I’ll be adding this to my sewing list for the summer. Find out how to make your own at Crazy Little Projects!

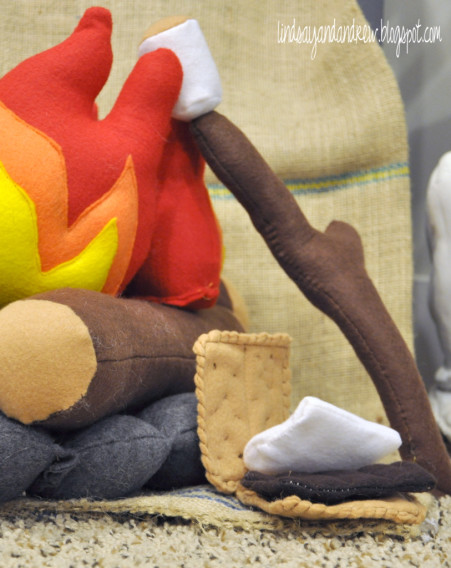
    4. Toy Campfire, because when camping, you need S’mores!
    Toy Campfire - Sewing for BoysApparently, I’m following a theme here, and maybe considering making ALL of these for my girls. Also, I’ve never had S’mores. Can you believe that?! I think it’s a childhood tradition that everyone should enjoy, or pretend to enjoy. 😉 There’s nothing better than family around a campfire!

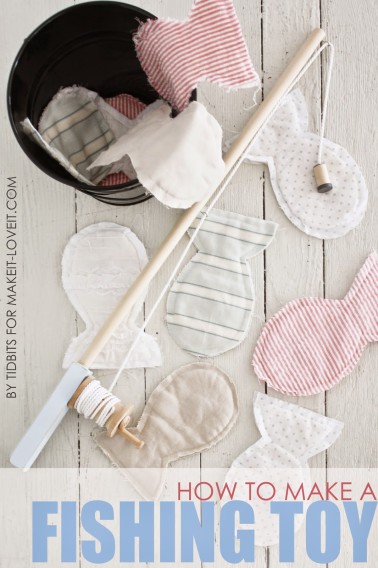
    5. Magnetic Fishing Pole and Fish
    DIY Fishing pole - Sewing for BoysI took my girls fishing for the first time last summer, but they’ve played with fishing poles before. Nothing this cute, but practicing with a real one (missing the hooks). They really enjoyed going fishing and screaming and splashing and learning about patience. However, after waiting and waiting for fish to bite, they lost interest pretty quickly. I think this fishing set would help rekindle their love for fishing, especially since they’ll catch a whole lot of fish! This is just one of many great projects found in sewing for boys, and they all look like fun!

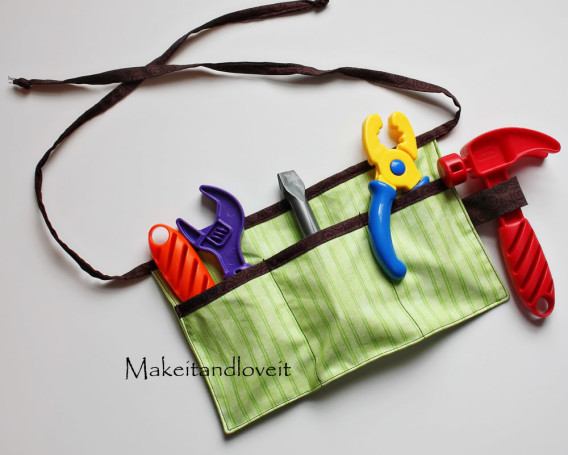
    6. Tool Belt
    Tool Belt  - Sewing for BoysI’m a firm believer that ALL children should learn to fix things. Starting small of course, but being self-sufficient is HUGE as they get older. Providing kids with their own tools now will further their curiosity of the world around them, and encourage them to ask questions, learn to diagnose and fix, and increase problem solving skills. I’ve made this tool belt for both my girls and they use them all the time, pretending to fix anything that catches their eye!

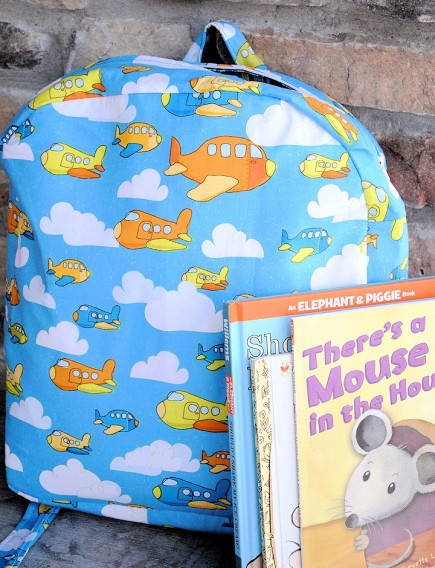
    7. A backpack to carry everything in!

    Toddler Backpack - Sewing for BoysI have a couple pack-rats around here and there’s no shortage of backpacks and purses and lunch bags and reusable grocery bags filled to the brim with all the “must-haves!” I think this tutorial is perfect for making your own toddler/kid sized backpack for your pack-rats. 😉


    See? Sewing for boys doesn’t have to be limited to ties and crayon roll-ups, and car holders. There’s a whole untapped world out there! Get creative!

    Post what you make on Instagram using #sewingwithpinkdoor for a chance to win $25 to our shop to purchase anything you need to create for your children, whether they be boys OR girls!
    Blog Sig_Sandra

    tags: , , , , , , , , , , ,

    One comment »

    18 Mar

    WIP Wednesday – Tula Pink Mini Quilt Swap – 3.18.15

    Posted under News, WIP Wednesday

    Hi folks! It sure has been a while, but we’ve been busy launching a new website, losing access to our blog, regaining access to our blog, and moving shop. Phew! Things are finally settling down, and as you can see, the blog is back up! We have a new warehouse space and we LOVE it! So much more space, and hopefully, this summer, we’ll be open a few times for open shop days and sew days. You’ll want to sign up for our newsletter if you’re local so we can let you know when that will happen! So if you’re local to Denver, or in Colorado, sign up here to be the first to know!

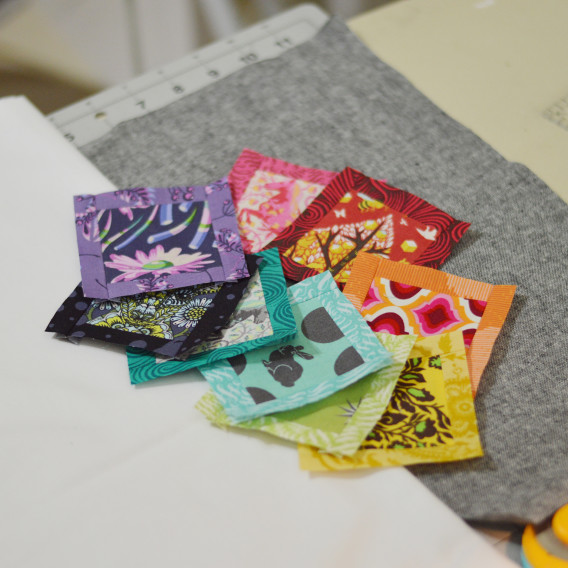
    Tula Pink Mini Quilt - Fabrics

    With all the changes going on and having gotten the flu, I’ve not sewn a single thing in almost six weeks (!!!). I finally got in gear this week and started working on my mini quilt for the #tulapinkminiquiltswap hosted on Instagram. I cut into my hoarded and much coveted Tula Pink fabrics for this lovely and got right into sewing. My partner had requested that the prints not be chopped up but rather, showcased in a way, so that is where I headed with this.

    Tula Pink Mini Quilt - Fabrics

    I quickly assembled some mini blocks, measuring 3-1/2″ I think, and then had to decide on a backing for my mini quilt. I don’t have a lot of yardage or bigger cuts in my stash, but decided it was either Kona White or Kaufman Yarn Dyed Essex Linen in Black… After much debate, I went with the black. It really helps the colors pop!

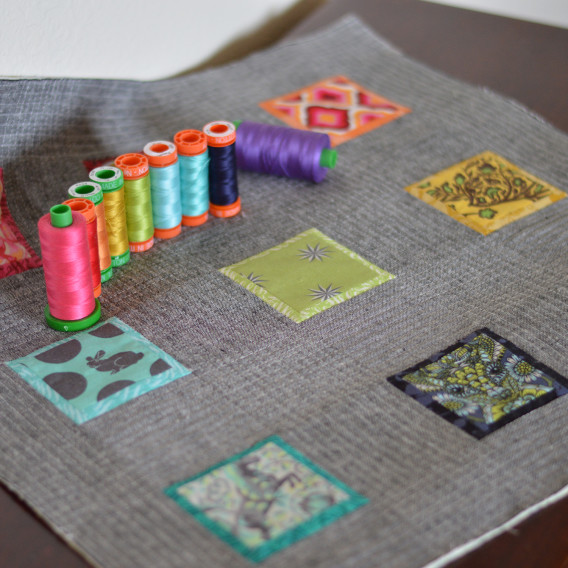
    Tula Pink Mini Quilt - Fabrics and Thread for hand-quilting

    Last night, I spent about 2 hours basting and quilting the mini quilt. I decided on a 1/4″ grid in the negative space and LOVE how it’s turning out. I also pulled some colored threads to do some hand quilting today, if I get a chance. I can’t wait to get this mini quilt completed and mailed off, and considering it’s due by the 27th, I better get to it! What are you working on lately?


    Blog Sig_Sandra

    tags: , , , , ,

    No Comments »