• 08 Apr

    Sewing for Boys – Tutorial Round Up!

    Posted under News, Sewing Tips and Tricks, Tutorials

    Let me start off by saying, I don’t have boys. I have two precious little girls who prefer all manner of pink and purple and glitter and sparkle. My youngest girl is pretty tomboy and not afraid of anything! I have to admit – I’m not the most girly-girl so I’m sometimes a little envious of the moms who can sew for boys. There is a market for boys’ items (albeit, smaller) and it’s amazing! There are tutorials and patterns, everywhere! I am compiling some of my favorite “sewing for boys” tutorials and patterns here, and I will mention, even my girls were quite excited about some of these! I’m quite excited about this Sewing for Boys post! Here we go!

    1. Collapsible Play Tent
    Collapsible Play Tent - DIY Sewing for Boys
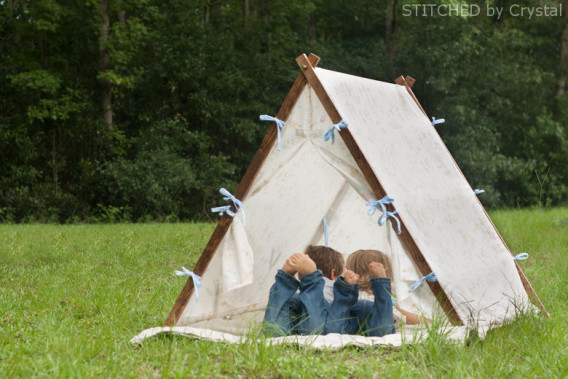
Is this not the most amazing tent!? I kind of want one for myself! You can find the tutorial to create your own little wonderland for your mini-me’s at Make It Love It.

    2. Super Hero Fort Kit

    DIY Super Hero Fort Kit - Sewing for Boys

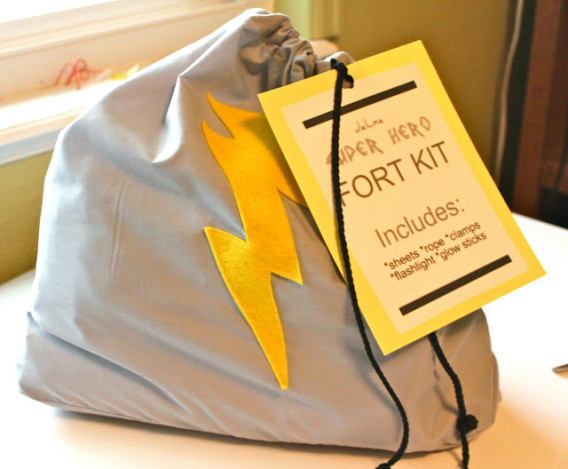
    If your little guy (or girl) would prefer to build their own tent, this is perfect! You give them all the supplies, tucked neatly into a customized bag, and let them build it themselves! This really is a great skill, and a lot of fun for everyone! You can find the info at Meg + Andy! Sewing for boys is looking more and more fun!

    3. Sleeping Bag, while we’re camping and all…
    Kid Sleeping Bag - Sewing for Boys

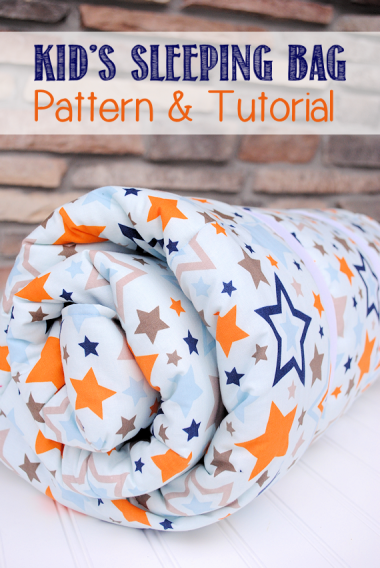
    Since we’ve discussed two ways of making tents, and with summer coming up, I figured I’d add in a tutorial for a kid size sleeping bag! Again, this works for boys and girls, and can be customized any way you’d like! You could even use flat bed sheets for the fabric, too! I think I’ll be adding this to my sewing list for the summer. Find out how to make your own at Crazy Little Projects!

    4. Toy Campfire, because when camping, you need S’mores!
    Toy Campfire - Sewing for Boys
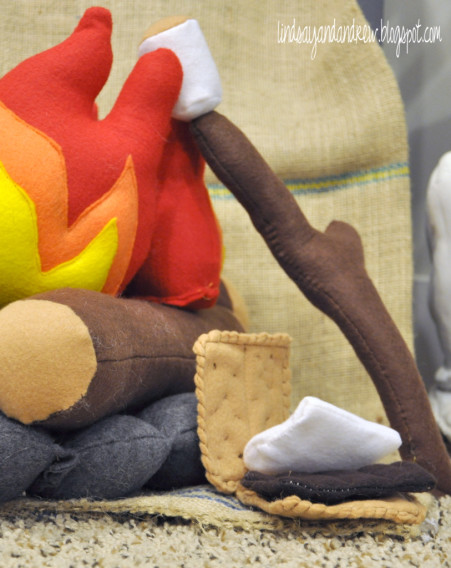
Apparently, I’m following a theme here, and maybe considering making ALL of these for my girls. Also, I’ve never had S’mores. Can you believe that?! I think it’s a childhood tradition that everyone should enjoy, or pretend to enjoy. 😉 There’s nothing better than family around a campfire!

    5. Magnetic Fishing Pole and Fish
    DIY Fishing pole - Sewing for Boys
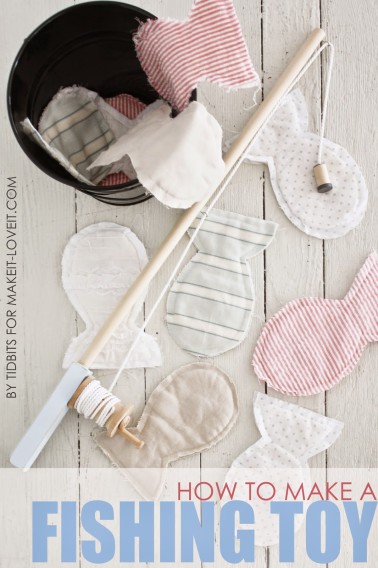
I took my girls fishing for the first time last summer, but they’ve played with fishing poles before. Nothing this cute, but practicing with a real one (missing the hooks). They really enjoyed going fishing and screaming and splashing and learning about patience. However, after waiting and waiting for fish to bite, they lost interest pretty quickly. I think this fishing set would help rekindle their love for fishing, especially since they’ll catch a whole lot of fish! This is just one of many great projects found in sewing for boys, and they all look like fun!

    6. Tool Belt
    Tool Belt  - Sewing for Boys
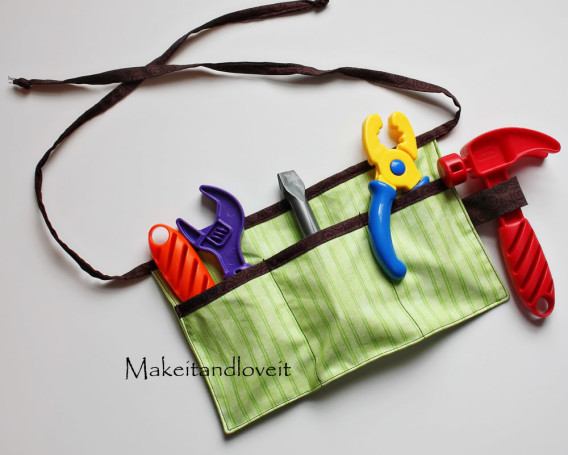
I’m a firm believer that ALL children should learn to fix things. Starting small of course, but being self-sufficient is HUGE as they get older. Providing kids with their own tools now will further their curiosity of the world around them, and encourage them to ask questions, learn to diagnose and fix, and increase problem solving skills. I’ve made this tool belt for both my girls and they use them all the time, pretending to fix anything that catches their eye!

    7. A backpack to carry everything in!

    Toddler Backpack - Sewing for Boys
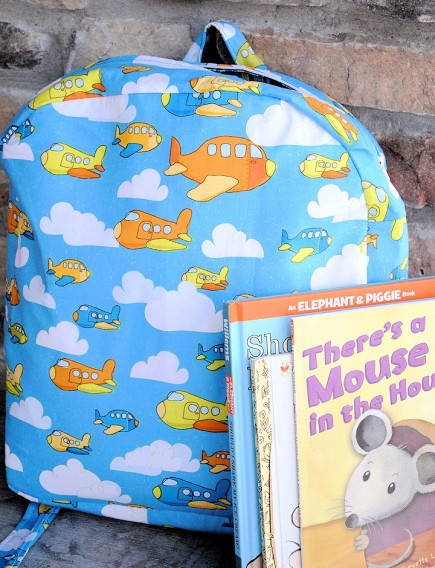
I have a couple pack-rats around here and there’s no shortage of backpacks and purses and lunch bags and reusable grocery bags filled to the brim with all the “must-haves!” I think this tutorial is perfect for making your own toddler/kid sized backpack for your pack-rats. 😉


    See? Sewing for boys doesn’t have to be limited to ties and crayon roll-ups, and car holders. There’s a whole untapped world out there! Get creative!

    Post what you make on Instagram using #sewingwithpinkdoor for a chance to win $25 to our shop to purchase anything you need to create for your children, whether they be boys OR girls!

    Blog Sig_Sandra

    tags: , , , , , , , , , , ,

    One comment »

    19 Jan

    Sewing Tips and Tricks [ Needle Size ]

    Posted under News, Sewing Tips and Tricks

    Want to know more about choosing the correct needle type and size?

    When you get a new sewing machine, you’re given a couple needles. And while that’s fantastic, they’re generally only one kind – Universal 80/12 or 90/14. As you sew more and more, you’ll soon realize that you need an arsenal of needles for all your projects. There are many brands out there and some machines are picky about the needles being used, but mine is not. However, I do have a preference on the needles I use. I’ve generally stuck to Organ brand (these are very sharp and strong, great for free motion quilting) and Schmetz Needles.

    Some needle types are used for denim, while others are for chiffon and organdy. Don’t know where to start? Pink Door Fabrics Needle Sizes-01The infographic above goes over a brief description on needles. The right number in the needle size is 12 in the graphic, and can go as small as 6 or 8 (very fine needle for lace, chiffon, etc.) and up to 20 (very thick and strong needle for leather and denim). I don’t typically follow the number on the left of the needle size.

    I will always use a universal 70/10 for piecing a quilt, 80/12 quilting needle for free motion quilting, and 90/14 for sewing pretty much anything, including dresses, zippers, etc.

    No matter what needles you choose, make sure you change the needle before beginning each new project or after 8-10 hours of use. You can tell a needle is getting dull by the sounds it makes going through the fabric sometimes, or if you’re getting snags in your fabric, or even if your thread is starting to shred. A lot of times, if you have skipped stitches occurring, it’s time to change the needle! If ever in doubt, just change the needle. It’s like the rotary blades we always forget to change, complain about when we have issues, and wonder why it took so long to change it out when it works amazingly.

    😉 Hope that helps!


    Blog Sig_Sandra


    tags: , , , , ,

    No Comments »

    05 Jan

    Sewing Tips & Tricks [Thread Weight]

    Posted under News, Sewing Tips and Tricks, Tutorials

    Pink Door Fabrics - Sewing Tips and Tricks - Thread Weight - always good to know which thread is best for what sewing practice!
    Hello! I hope you’ve all recovered from your New Year’s celebrations and are getting back into the swing of things like we are! It’s been a lovely couple days off, but you and I know it must come to an end. We’ve brainstormed and come up with a way to restructure and revamp our blog, posts and all.

    We’ll start off the new year with a new weekly series, called Sewing Tips and Tricks! Every week, we’ll introduce you to a wealth of knowledge about sewing, as well as little sewing tips and tricks we like to utilize for ourselves. We feel that as a sewing community, you can’t ever have too much knowledge about sewing! I mean, everyone has a different perspective or way of doing things and we can’t improve if we don’t learn new things, am I right?

    Sewing Tips - Thread Weight - Detail
    For this week’s sewing tip, I tested out four weights of Aurifil that I had on had for this post which included 50 wt., 40 wt., 12 wt., and linen thread. But first, let’s explain what each is for, because that’s realistically the best place to start. I generally only use Aurifil Cotton Mako thread but the weights and their uses can apply to any brand. I know other people are happy with Coats & Clark, and others yet are happy with Gutermann. It’s all a personal preference!

    Weight

    Weight measurement, designated as “wt”, uses a fixed weight system. The “weight” of the thread is actually a length measurement, determined by measuring the length of 1 gram of thread. The higher the weight number, the lighter the thread. For example, a thread labeled 60 wt. means that 60 meters of the thread weigh 1 gram. A 40 wt thread only takes 40 meters to weigh 1 gram, so it is heavier. This may seem confusing, but just remember: smaller weight number, heavier thread. This same measurement applies to paper, in case you were wondering.

    50 wt. — Generally, I feel this is the best weight for piecing quilts or sewing seams. It’s thin and 100% cotton (though some people use polyester or a blend of both) and sits nicely in the seam when I press quilt blocks open. When I only have a 1/4″ seam allowance to work with, using a thick thread means the seam allowance is no longer 1/4″ once ironed. I need that seam accurate! I feel like I get flatter seams with the 50 wt. thread than I do with any other. Also, Coats & Clark 50 wt. is not the same as Aurifil 50 wt. It’s a bit thicker, though I’m not sure why. I prefer 100% cotton thread, because my machine likes it. I’ve also read several other blogs that state the cotton fabric you use in quilts, should last longer than the thread, in the event of future repairs. If you use polyester thread on seams, the fabric could disintegrate eventually leaving the poly thread, making the quilt much harder to repair than if the cotton thread just broke. I’ve not had a quilt long enough to test this theory so I can’t attest to the accuracy of it. Quilting with poly thread seems to be the standard for many longarmers. Again, I use 100% cotton Aurifil but I also quilt on a domestic machine, not a longarm (yet!).

    40 wt. — This 40 wt. thread is the perfect thickness for machine quilting. I really love that it pops more on the quilt top and adds a little oomph! It’s not so thick that it’s really obvious when you stand back, but sometimes 50 wt. thread can really disappear and then all you’re hard work while quilting wasn’t worth it! Unless of course, you’re not wanting your quilting to be really visible, then it’s great! I will admit, I personally use 50 wt. MUCH more often than I use 40 wt., but I have used 40 wt. when I am free motion quilting a large blank space. It helps the quilting show up nicely!

    Sewing Tips - Thread Weight - Detail2

    12 wt. — Aurifil 12 wt. thread is amazing for hand quilting and embroidery. It shows up beautifully and of course comes in all sorts of amazing colors! For this thickness, Aurifil recommends Topstitch #90/14 needle, and you’ll need to loosen the upper tension a bit if machine quilting with this.

    Linen — I have to say, this thread matches Robert Kaufman Essex Linen in Flax PERFECTLY! It does NOT perform well for machine quilting or piecing as it’s not very strong and I had several thread breaks occurring. It would however be perfect for hand quilting little details (think Nana Company style!)

    Well, that wraps up this week’s Sewing Tips and Tricks! Do you have any feedback to share? What are your experiences with thread weights? Does one brand work better for you than another?

    tags: , , , , , , ,

    No Comments »