• 30 Jan

    Valentine’s Day – A Quilt Pattern

    Posted under Free Patterns, News, Tutorials

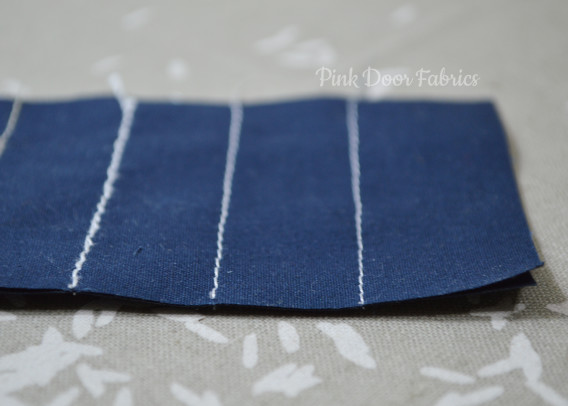
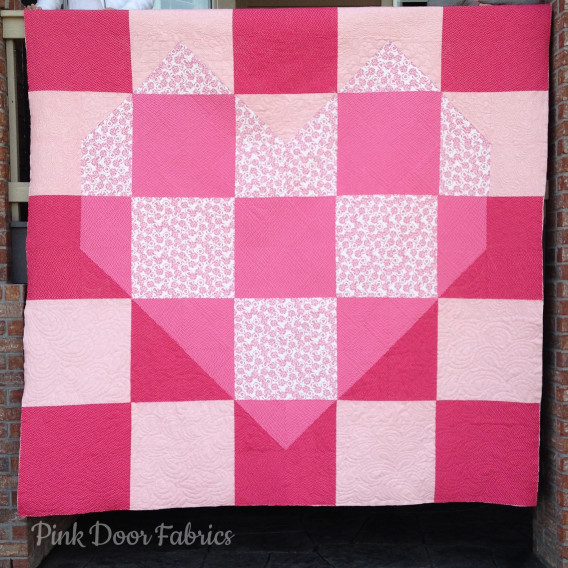
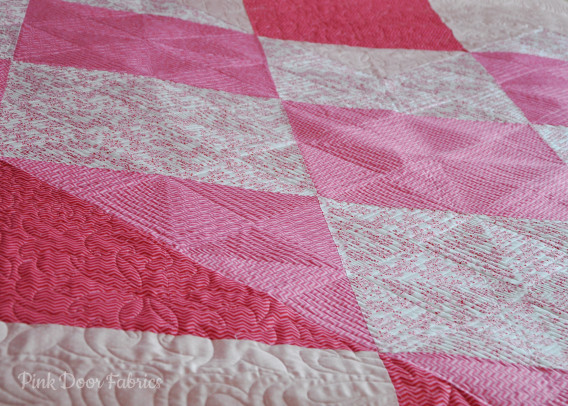
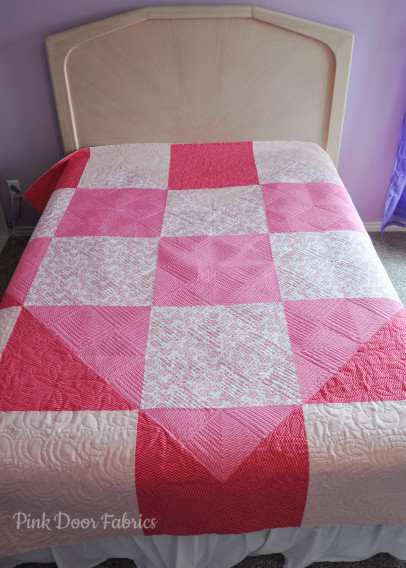
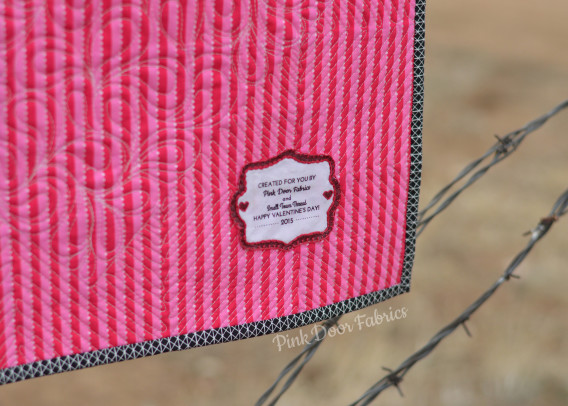
    Hello! Yes, it’s been a while, but that’s only because we’ve been working behind the scenes to create a pattern to share with you all! Exciting, right? We worked with Amy Wade (our awesome long-armer) from the Denver Metro Modern Quilt Guild to create this pattern. Well actually, she did all the hard work. We just made it pretty. 😉 The bed size quilt measures 95″ square, perfect for your queen size bed or smaller, and with such big blocks, this quilt goes together SO FAST! Can we take a minute to just appreciate the stunning quilting Amy did on this Valentine quilt? It’s so beautiful! I love how she did straight line inside the heart and fun free motion outside of the heart! It’s PERFECT!

    And now, introducing our very first FREE pattern for our fans! Please welcome, Valentine’s!

    IMG_2223 copy

    DSC_7182 copy

    DSC_7180 copy


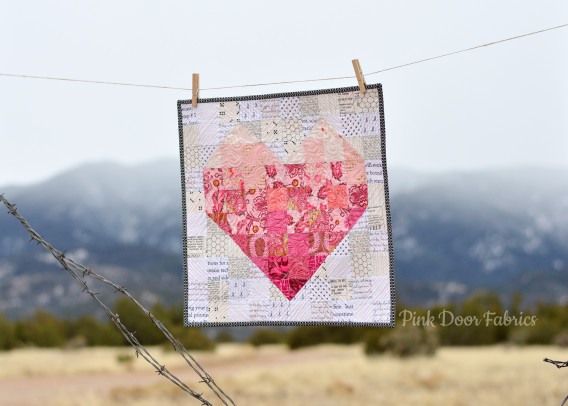
    With Valentine’s Day just around the corner, we thought it would be nice to have a quick and easy mini-quilt to go along with the full pattern! Both quilts use the same exact pattern, just different fabrics and composition. It’s a great pattern for flexibility and if you change up the block size, it could be great for bee groups as well!

    Valentine's Day Mini Quilt

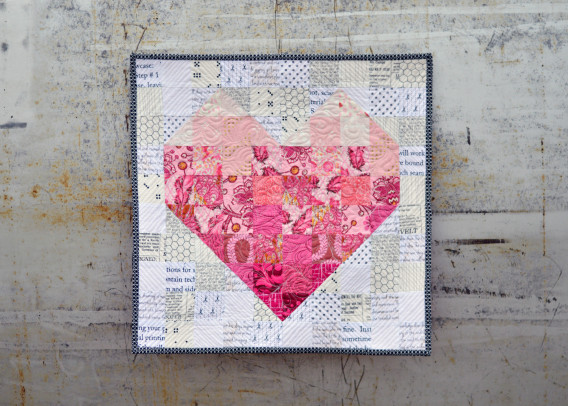
    The mini quilt measures 30″ square in the pattern, but I made mine 20″ square. It’s pretty easy to resize however you’d like to make any size you need. As mentioned, I used the exact same pattern as Amy, but I opted for small low volume squares in the background as opposed to the checkerboard squares and then I cut into my Tula (GASP!) for the heart. You can have a chance to win this mini quilt (GO NOW!) over on Instagram. You’ll definitely want to participate in this one!

    Valentine_mini

    Valentine_mini_detail

    Valentine_mini_back


    So there you have it! Our first FREE pattern for you! You can find the large size here and the mini size here. Have fun with it! Tag us on Instagram so we can find your quilts and show off what you’ve made! Thanks for supporting us in the past, present, and future. We are eternally grateful!

    Blog Sig_Sandra


    tags: , , , , ,

    One comment »

    27 Sep

    Lanyard Tutorial

    Posted under Fall Quilt Market 2014, Tutorials

    DSC_1022_main

    The kids are back in school. The chaos has returned. The early morning struggles don’t seem to get easier. The struggle of Back-to-School is exhausting!

    But, on the plus side, one of my kids is in Kindergarten, so while I get to spend to some one-on-one time with my youngest, she also goes to preschool three days a week for a few hours. That means just a few hours a week to be ALONE. This has been a huge transition and feels quite lonely initially but now that we’ve been in school about a month, I’m LOVING IT!

    Big kid brought home her new school ID. She proceeded to ask for thread to hang up her ID so she didn’t lose it. Dad suggested buying a lanyard… I immediately nixed both ideas and got right down to digging through my stash for some fabric. See where this is going?

    DSC_0997edit

    I have been hoarding stashing this Tula Pink Plume for some time now. My daughter asked if we could use it. I couldn’t deny her! She knows what she likes, and I can’t be more proud! So, lets get this tutorial started.

    You will need:
    – (1) 2.5″ x 5″ strip of fabric
    – (1) 2.5″ x 36″ strip of fabric
    – (1) 5/8″ Swivel clasp AND D-ring
    – Rotary Cutter/Ruler
    – Iron
    – Snaps of your choice
    – Sewing machine and all the goodies that go with that, like coordinating thread and a sharp needle.

    So first, grab your fabric and cut the two pieces. You could very likely get all you need from a 2-1/2″ x WOF piece.

    DSC_0999_edit

    Then, you’ll take each strip and fold in half lengthwise. So now it’ll measure 1-1/4″ x 5″ or 1-1/4″ x 36″. Fold well and press with a lot of steam.
    Open up each strip and fold the edges into the middle. Press again.
    On the 5″ piece, take in your short edges, and fold them over by 1/4″. We want those raw edges tucked away.
    Fold your whole piece back in half like you did in the first step. Your piece should measure 5/8″ wide.

    Lanyard Tutorial


    On the 5″ piece, go ahead and top stitch all the way around. This piece is complete for now. Set aside.

    DSC_1007edit

    On the 36″ piece, while folded, slide on your Swivel clasp. Then take both short edges, and unfold slightly making sure to align right sides together. Go ahead and sew those together with a 1/4″ seam. Press the seam open, and refold your strip.

    DSC_1011_edit

    DSC_1009_edit

    Now we will topstitch the entire piece. It should look like one big circle if you have sewn it correctly. Make sure to keep moving the Swivel Clasp so you don’t sew over it.

    DSC_1012_edit

    DSC_1014_edit

    Now you’re almost done! We just need to add the snaps to our little 5″ piece to create a loop, then add your ID, and D-Ring, and that’s it!

    DSC_1018_edit

    Go ahead and add your snaps following the manufacturer’s directions. I used size 16 plastic Kam Snaps that I had, but any other snap will work fine too. I won’t show you this step since it varies greatly depending on brand/type.

    DSC_1019_Edit

    As you can see, on mine, I had to wait to add the second snap since it wouldn’t fit through the tiny slot on the ID. So this pictures shows that I added one snap, then the D-Ring, then the ID, and I’ll add the last snap part at the end. You may be able to do yours all at once, or may need to divide it like I did. Go ahead and finish this step.

    DSC_1020_edit

    Now, take your 36″ circle/strip, and move the Swivel Clasp to the middle. Meaning, my seam where I sew the two edges together will go on the top, and the swivel clasp will go on the bottom. Imagine it being on your neck. Get it? Squish that little end as flat as it will go and move your needle all the way to the right to sew a stitch line as close to the clasp as you can get. This will prevent the clasp from moving all over and staying put. I did the same thing with the 5″ piece but it’s not necessary.

    DSC_1021_edit

    That’s it! All you have to do is close up your little 5″ piece using the snaps, and then hook the Swivel clasp to the D-ring. DONE! Good job!

    DSC_1022 copy

    Blog Sig_Sandra

    tags: , , ,

    No Comments »

    05 Jan

    Sewing Tips & Tricks [Thread Weight]

    Posted under News, Sewing Tips and Tricks, Tutorials

    Pink Door Fabrics - Sewing Tips and Tricks - Thread Weight - always good to know which thread is best for what sewing practice!
    Hello! I hope you’ve all recovered from your New Year’s celebrations and are getting back into the swing of things like we are! It’s been a lovely couple days off, but you and I know it must come to an end. We’ve brainstormed and come up with a way to restructure and revamp our blog, posts and all.

    We’ll start off the new year with a new weekly series, called Sewing Tips and Tricks! Every week, we’ll introduce you to a wealth of knowledge about sewing, as well as little sewing tips and tricks we like to utilize for ourselves. We feel that as a sewing community, you can’t ever have too much knowledge about sewing! I mean, everyone has a different perspective or way of doing things and we can’t improve if we don’t learn new things, am I right?

    Sewing Tips - Thread Weight - Detail
    For this week’s sewing tip, I tested out four weights of Aurifil that I had on had for this post which included 50 wt., 40 wt., 12 wt., and linen thread. But first, let’s explain what each is for, because that’s realistically the best place to start. I generally only use Aurifil Cotton Mako thread but the weights and their uses can apply to any brand. I know other people are happy with Coats & Clark, and others yet are happy with Gutermann. It’s all a personal preference!

    Weight

    Weight measurement, designated as “wt”, uses a fixed weight system. The “weight” of the thread is actually a length measurement, determined by measuring the length of 1 gram of thread. The higher the weight number, the lighter the thread. For example, a thread labeled 60 wt. means that 60 meters of the thread weigh 1 gram. A 40 wt thread only takes 40 meters to weigh 1 gram, so it is heavier. This may seem confusing, but just remember: smaller weight number, heavier thread. This same measurement applies to paper, in case you were wondering.

    50 wt. — Generally, I feel this is the best weight for piecing quilts or sewing seams. It’s thin and 100% cotton (though some people use polyester or a blend of both) and sits nicely in the seam when I press quilt blocks open. When I only have a 1/4″ seam allowance to work with, using a thick thread means the seam allowance is no longer 1/4″ once ironed. I need that seam accurate! I feel like I get flatter seams with the 50 wt. thread than I do with any other. Also, Coats & Clark 50 wt. is not the same as Aurifil 50 wt. It’s a bit thicker, though I’m not sure why. I prefer 100% cotton thread, because my machine likes it. I’ve also read several other blogs that state the cotton fabric you use in quilts, should last longer than the thread, in the event of future repairs. If you use polyester thread on seams, the fabric could disintegrate eventually leaving the poly thread, making the quilt much harder to repair than if the cotton thread just broke. I’ve not had a quilt long enough to test this theory so I can’t attest to the accuracy of it. Quilting with poly thread seems to be the standard for many longarmers. Again, I use 100% cotton Aurifil but I also quilt on a domestic machine, not a longarm (yet!).

    40 wt. — This 40 wt. thread is the perfect thickness for machine quilting. I really love that it pops more on the quilt top and adds a little oomph! It’s not so thick that it’s really obvious when you stand back, but sometimes 50 wt. thread can really disappear and then all you’re hard work while quilting wasn’t worth it! Unless of course, you’re not wanting your quilting to be really visible, then it’s great! I will admit, I personally use 50 wt. MUCH more often than I use 40 wt., but I have used 40 wt. when I am free motion quilting a large blank space. It helps the quilting show up nicely!

    Sewing Tips - Thread Weight - Detail2

    12 wt. — Aurifil 12 wt. thread is amazing for hand quilting and embroidery. It shows up beautifully and of course comes in all sorts of amazing colors! For this thickness, Aurifil recommends Topstitch #90/14 needle, and you’ll need to loosen the upper tension a bit if machine quilting with this.

    Linen — I have to say, this thread matches Robert Kaufman Essex Linen in Flax PERFECTLY! It does NOT perform well for machine quilting or piecing as it’s not very strong and I had several thread breaks occurring. It would however be perfect for hand quilting little details (think Nana Company style!)

    Well, that wraps up this week’s Sewing Tips and Tricks! Do you have any feedback to share? What are your experiences with thread weights? Does one brand work better for you than another?

    tags: , , , , , , ,

    No Comments »