• 30 Jan

    Valentine’s Day – A Quilt Pattern

    Posted under Free Patterns, News, Tutorials

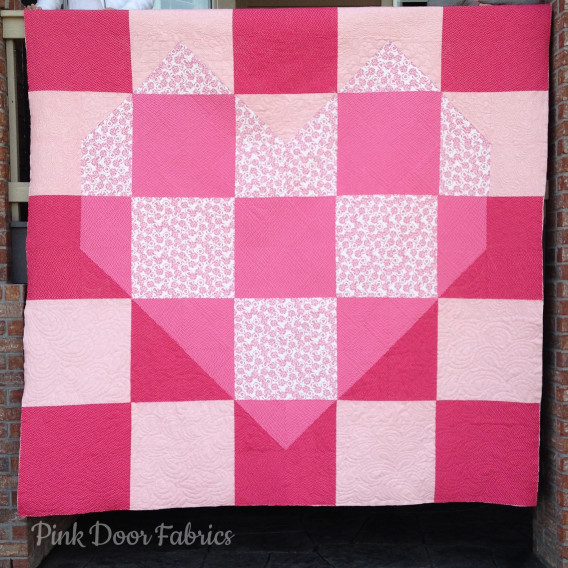
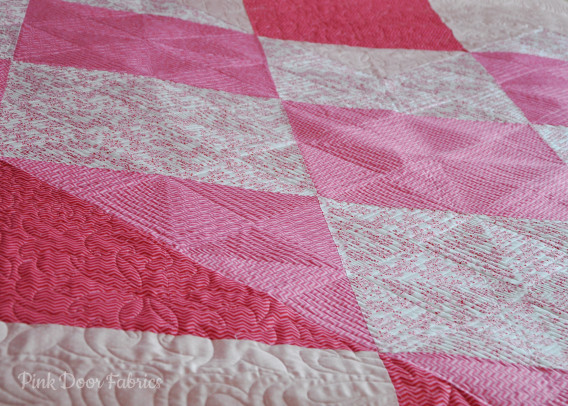
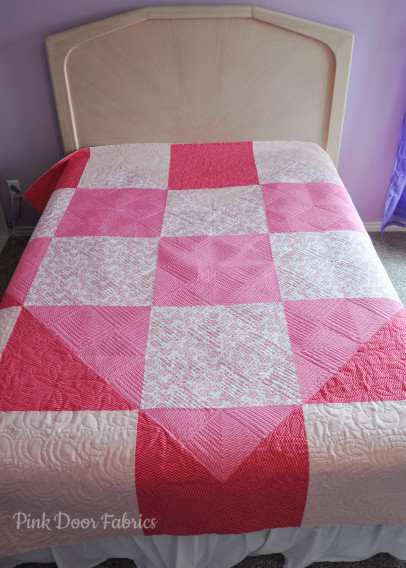
    Hello! Yes, it’s been a while, but that’s only because we’ve been working behind the scenes to create a pattern to share with you all! Exciting, right? We worked with Amy Wade (our awesome long-armer) from the Denver Metro Modern Quilt Guild to create this pattern. Well actually, she did all the hard work. We just made it pretty. 😉 The bed size quilt measures 95″ square, perfect for your queen size bed or smaller, and with such big blocks, this quilt goes together SO FAST! Can we take a minute to just appreciate the stunning quilting Amy did on this Valentine quilt? It’s so beautiful! I love how she did straight line inside the heart and fun free motion outside of the heart! It’s PERFECT!

    And now, introducing our very first FREE pattern for our fans! Please welcome, Valentine’s!

    IMG_2223 copy

    DSC_7182 copy

    DSC_7180 copy


    With Valentine’s Day just around the corner, we thought it would be nice to have a quick and easy mini-quilt to go along with the full pattern! Both quilts use the same exact pattern, just different fabrics and composition. It’s a great pattern for flexibility and if you change up the block size, it could be great for bee groups as well!

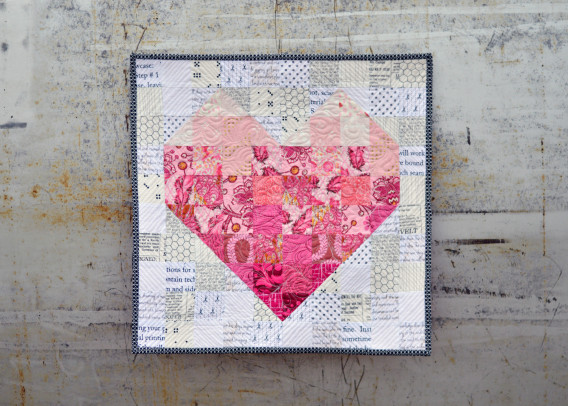
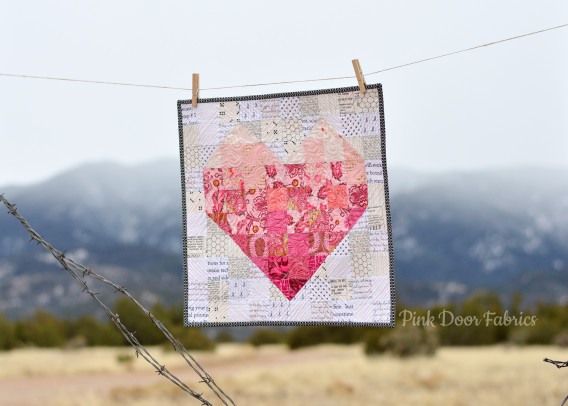
    Valentine's Day Mini Quilt

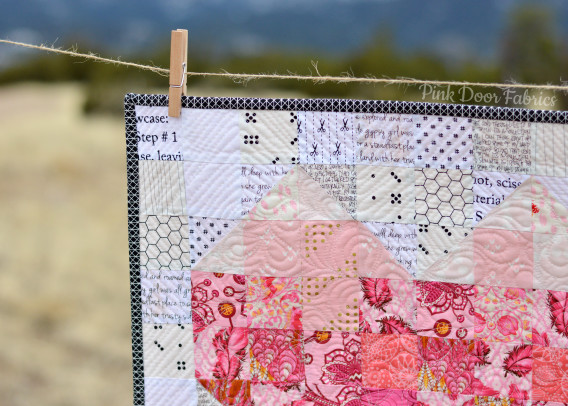
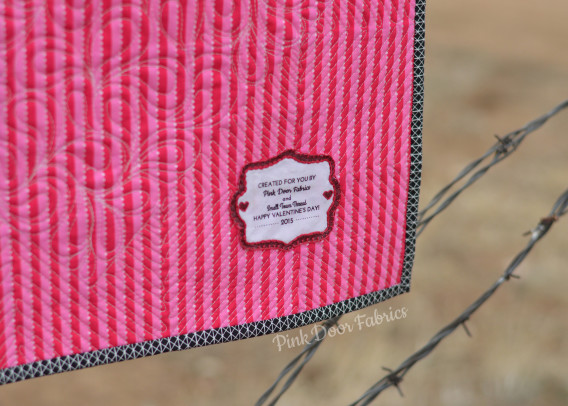
    The mini quilt measures 30″ square in the pattern, but I made mine 20″ square. It’s pretty easy to resize however you’d like to make any size you need. As mentioned, I used the exact same pattern as Amy, but I opted for small low volume squares in the background as opposed to the checkerboard squares and then I cut into my Tula (GASP!) for the heart. You can have a chance to win this mini quilt (GO NOW!) over on Instagram. You’ll definitely want to participate in this one!

    Valentine_mini

    Valentine_mini_detail

    Valentine_mini_back


    So there you have it! Our first FREE pattern for you! You can find the large size here and the mini size here. Have fun with it! Tag us on Instagram so we can find your quilts and show off what you’ve made! Thanks for supporting us in the past, present, and future. We are eternally grateful!

    Blog Sig_Sandra


    tags: , , , , ,

    One comment »

    19 Jan

    Sewing Tips and Tricks [ Needle Size ]

    Posted under News, Sewing Tips and Tricks

    Want to know more about choosing the correct needle type and size?

    When you get a new sewing machine, you’re given a couple needles. And while that’s fantastic, they’re generally only one kind – Universal 80/12 or 90/14. As you sew more and more, you’ll soon realize that you need an arsenal of needles for all your projects. There are many brands out there and some machines are picky about the needles being used, but mine is not. However, I do have a preference on the needles I use. I’ve generally stuck to Organ brand (these are very sharp and strong, great for free motion quilting) and Schmetz Needles.

    Some needle types are used for denim, while others are for chiffon and organdy. Don’t know where to start? Pink Door Fabrics Needle Sizes-01The infographic above goes over a brief description on needles. The right number in the needle size is 12 in the graphic, and can go as small as 6 or 8 (very fine needle for lace, chiffon, etc.) and up to 20 (very thick and strong needle for leather and denim). I don’t typically follow the number on the left of the needle size.

    I will always use a universal 70/10 for piecing a quilt, 80/12 quilting needle for free motion quilting, and 90/14 for sewing pretty much anything, including dresses, zippers, etc.

    No matter what needles you choose, make sure you change the needle before beginning each new project or after 8-10 hours of use. You can tell a needle is getting dull by the sounds it makes going through the fabric sometimes, or if you’re getting snags in your fabric, or even if your thread is starting to shred. A lot of times, if you have skipped stitches occurring, it’s time to change the needle! If ever in doubt, just change the needle. It’s like the rotary blades we always forget to change, complain about when we have issues, and wonder why it took so long to change it out when it works amazingly.

    😉 Hope that helps!


    Blog Sig_Sandra


    tags: , , , , ,

    No Comments »

    06 Jan

    It’s time to clean out my desk – Nesting Boxes to the Rescue!

    Posted under New Fabrics, News, Reviews, Selfish Sewing, Tutorials

    Hi All!

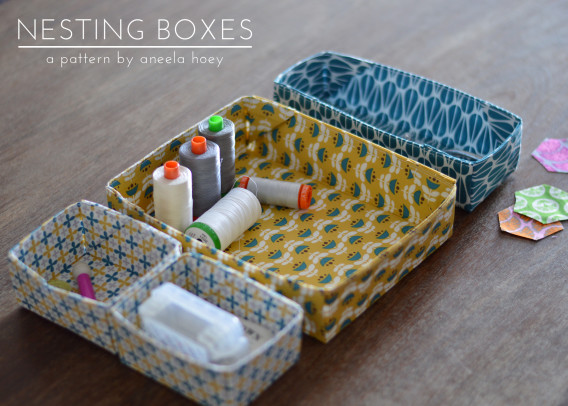
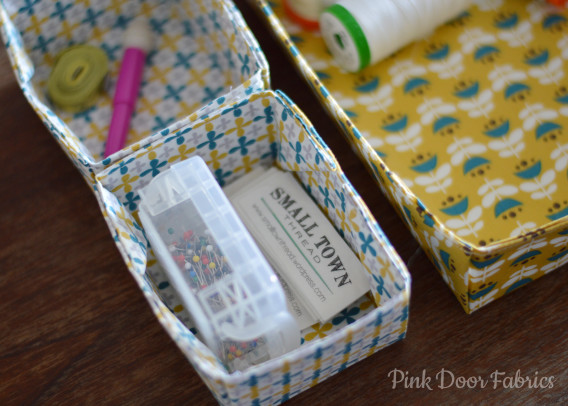
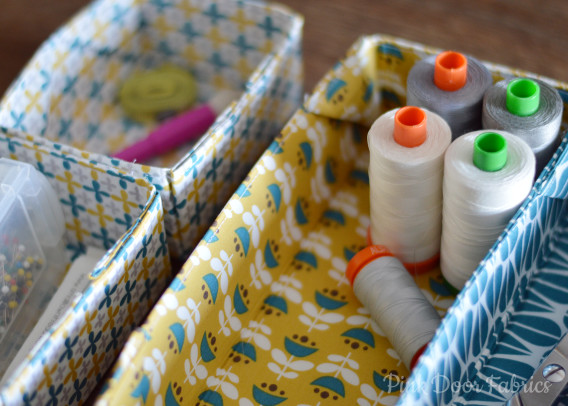
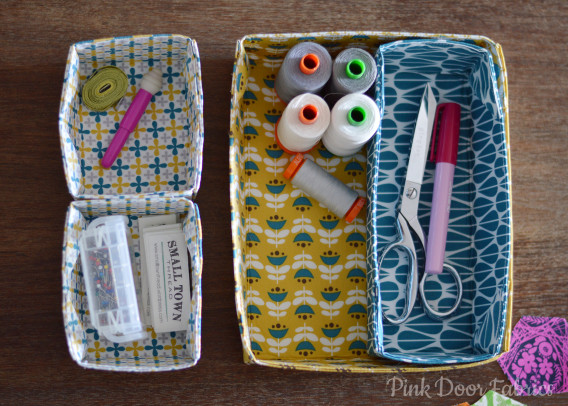
    It’s been a busy first week of the New Year around here! Anyone else agree? I’ve been on this binge to completely purge my house (I do this often – don’t ask!) and I started in my sewing room. My desk…this big heavy metal beast of a desk, well, it needs to go. I have already procured a replacement from a friend of mine. The new desk is a beautiful old wooden desk from the local Holy Cross Abbey. It was one that the monks used fifty years ago. Can we say exciting!? I do need to sand it down a bit and refinish the top as it’s a little rough for fabric, but it’s otherwise in fabulous condition! I also need to disassemble it so I can bring it down to the basement, eventually. 😉 But anyways, in hopes of kicking off my new storage solution and work area, I created some fun little nesting boxes for my desk! You can find the pattern here and it seriously, took me no more than 3-4 hours to do them all! SO SO EASY!

    Pink Door Fabrics - Nesting Boxes, Storage, Desk Organization, Sewing Organization, Notions

    I contacted Jennifer at Monaluna Design for the absolutely GORGEOUS fabric, and in case you’re curious, it’s called Westwood. You can find some for yourself here and I promise, you won’t regret it. It’s a lovely fabric made with Organic Cotton and the drape is amazing. It’s most similar in feel to Art Gallery Fabrics, but a little thicker. Not much! The colors are so very me! I especially LOVE LOVE LOVE the Deerheart print! Stay tuned for a project made with that.
    ++ Note: We are currently OUT of the Llama Love but will be getting more soon! ++

    DSC_1711 copy

    The pattern includes directions for four (4) different size boxes. There’s a small (3″ x 4″ x 2″), medium (3″ x 8″ x 2″), and large (6-1/2″ x 8-1/2″ x 2″) and with their 2″ height, they are PERFECT for inside drawers! The pattern calls for Fast 2 Fuse interfacing, but suggests that Peltex 72F will work too. I only had Peltex 71F, meaning it’s fusible on one side one, so I used Pellon Wonder Under to make the second side fusible. Works like a charm! I do recommend using a heavyweight interfacing for the nesting boxes as they are meant to be sturdy. Pellon DecorBond or similar will make for floppy boxes, and that’s definitely not the look I was going for.

    DSC_1716 copy

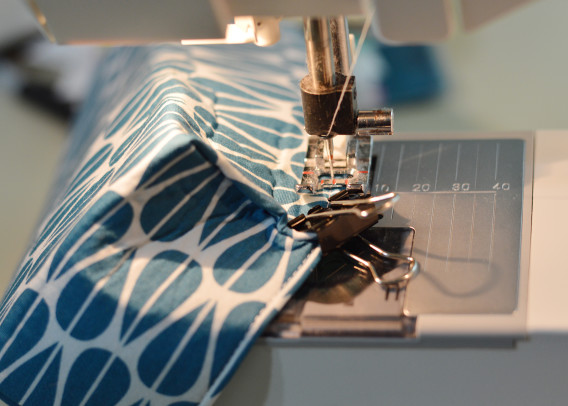
    The patterns was well written, and easy to follow. There are some diagrams to illustrate steps as you go and it’s seriously a very fast project! Like I said, I made all four in 3-4 hours with child interruptions (they’re ALWAYS hungry!) and picking up kids from school, etc. The only machine stitching you do, is while the nesting box is flat; there’s a bit of topstitching done. Otherwise, the pattern says to hand stitch the corners, but I rebelled and machine stitched mine. As long as you go slow, and take your time on that part, it can be done. Don’t worry about those pesky wrinkles you see (if you used Peltex 71/72F) as they’ll iron right out. I can’t say if that’s the case with the Fast 2 Fuse, as I didn’t have any to test out.

    Pink Door Fabrics - Nesting Boxes, Storage, Desk Organization, Sewing Organization, Notions

    Pink Door Fabrics - Nesting Boxes, Storage, Desk Organization, Sewing Organization, Notions

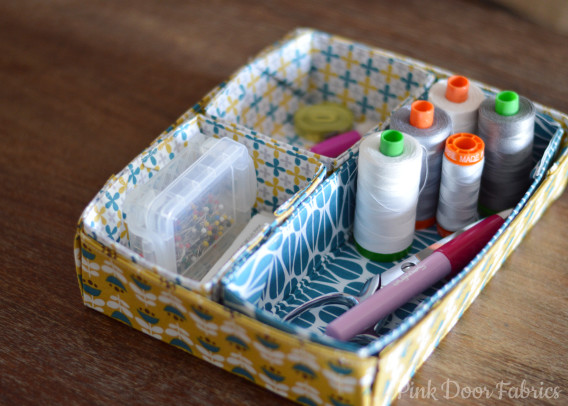
    As you can see here, the boxes all “nest” together, hence the name, Nesting Boxes. They’re really the perfect size for all your notions or threads, or even a pair of scissors and glue pen. You can also separate the boxes and use them individually however you’d like! The possibilities are endless!

    Pink Door Fabrics - Nesting Boxes, Storage, Desk Organization, Sewing Organization, Notions

    I definitely see myself making many more sets of these as gifts for my family and friends. Go get your pattern now and spend a few hours making them! You will not regret it!

    tags: , ,

    2 Comments »

    17 Dec

    Handmade Christmas Gifts

    Posted under News

    Hi friends! Dropping in today with another handful of handmade Christmas gift ideas. They are all relatively quick and easy, one is even no sew!
    Untitled

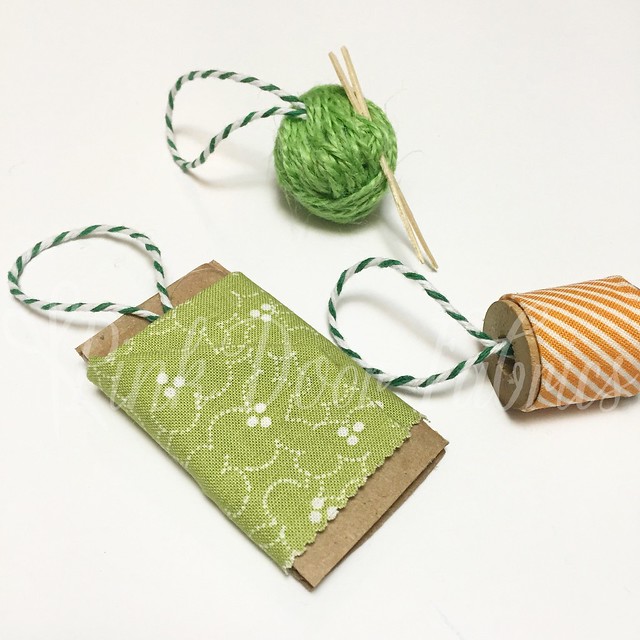
    First up are these cute mini ornaments for the crafter/fabric obsessed in your life. Using left over pieces of cardboard, an old wooden spool, and some green twine and toothpicks, I rigged up these quick crafty ornaments. A dab of hot glue here and there made this project a 10 minute job!
    Untitled
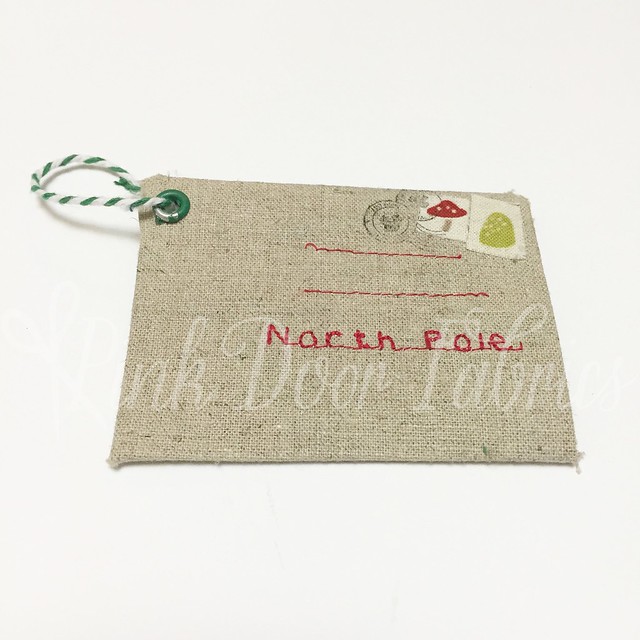
    This next ornament was finished in about 30 minutes. I traced an envelope onto a piece of linen and cut it out, interfaced a piece of colorful fabric for the inside of the envelope, and machine-stitched the address with my straight stitch. Then I fussy cut a few stamps to add to the top. The envelope is secured in the back with a bit of fusible webbing, but the top is left open so you can see the fabric peeking out if you flip it over. I attached a small eyelet in the corner for easy hanging.

    Untitled

    (fabric is Into the Woods by Lella Boutique for Moda)

    Next up is a project for anyone needing a bit of warmth in their lives. These heat packs are filled with organic rice or wheat berries. The wheat berries are a bit larger and are nice for muscle tension because of the extra bit of weight. I traced around a travel neck pillow I had lying around and made a quick template for the neck-sized warmers. I added about 6 cups of rice/ wheat berries, using a funnel and sewing gussets in each side to keep the rice and wheat evenly distributed. One 1/2 yard of fabric will yielded one neck pillow and the larger rectangle warmer.
    Untitled

    (fabric is by Parson Gray for Free Spirit and Architextures by Carolyn Friedlander for Robert Kaufman)

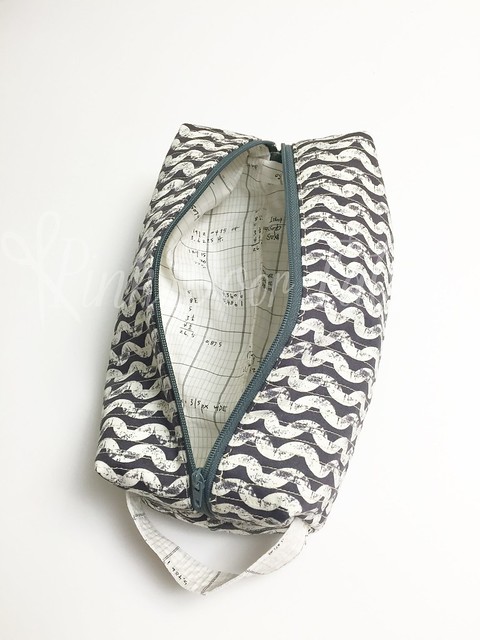
    Here is a gift idea for the men in your life. I followed the boxy pouch tutorial on the Pink Stitches blog . There are so many great graphic fabric choices out there within the last several years, making fabric selection really easy. I’m hoping this bag will make a nice addition to my husbands pipe collection. He’s always looking for another place to store his tobacco and lighter accessories.
    Untitled

    (fabric is Simply Style by V and Co for Moda)

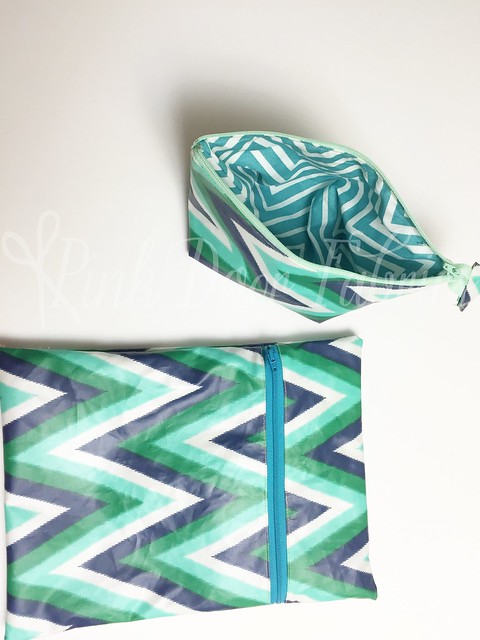
    I tried my hand at sewing with some laminated cotton and ended up with these two bags. The larger bag on the bottom was just a “make it up as you go” bag following basic zipper pouch construction. I made it extra large for a variety of purposes. This one would be nice to slip your iPad in if you are traveling anywhere moisture might be a concern. It will also work great as a gift for new moms as this size is an indispensable addition to a diaper bag to store wet/dirty baby clothes or cloth diapers in. And you can toss the bag in the wash with the rest of the laundry! I also tried it out with some of my knitting and a set of needles and I thought it would make a nice project bag.

    The pouch on the top is Noodlehead’s Open Wide Pouch  in the medium size. I think this one would make a nice make up bag or carry-all pouch to place inside a larger bag. The laminated exterior means it won’t be as vulnerable to that random piece of sticky gum that always seems to be hanging out in the bottom of your bag. I’m hoping this will be much more durable than the average zipper pouch!
    Untitled

    (fabric is Miss Kate by Bonnie and Camille for Moda and Handcrafted by Allison Glass for Andover)

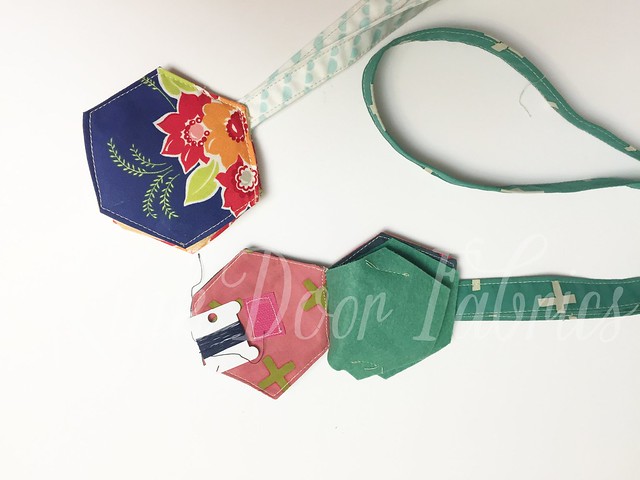
    For the quilter/hand sewer in your life, I made these quick hexagon needle books in about 15 minutes! Just cut four hexagons in a quilting weight fabric. Cut one small piece of hook and loop or Velcro and sew it to the right side of one of the hexagons. Match up and sew two hexagons right sides together, leaving a small opening for turning. I top stitched the openings on one closed but left the top hexagon open so that I could sneak the strap inside the opening. Cut some felt hexagons for the pages and assemble a long strap… I cut mine the WOF and then trimmed it down based on where I wanted the needle book to rest while around my neck, then folded it in toward the center twice with the wrong sides together and top stitched the strap closed. Making sure the piece of hook and loop closure is facing the inside of the book, I layered the book with the cotton hexagon, two felt pages, and the other cotton hexagon with the strap tucked inside the opening. Sew all the layers together at one corner.

    I hot glued the other piece of hook and loop to the back of an embroidery bobbin so that I could attach that to my needle book and keep my thread handy when binding a quilt or hand sewing.
    Untitled


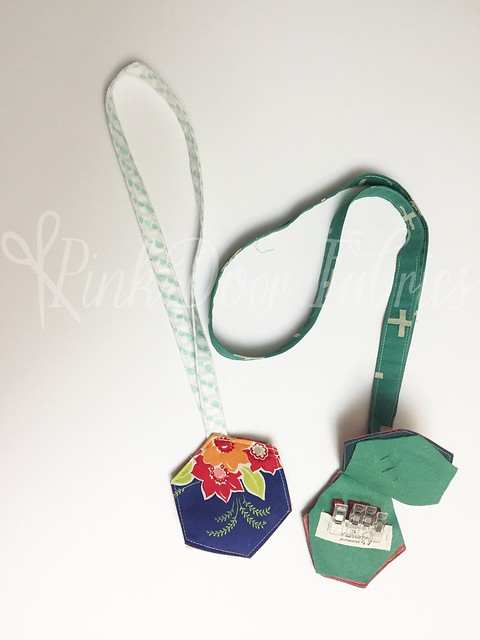
    The other page has a small piece of ribbon or cotton so that I can store my Clover Wonder clips inside (I can even slip my scissors through the cotton ribbon to keep nearby). The top page holds my needles. All set for binding and no worries about loosing needles in the couch or misplacing my spool of thread! Oh wait, these were supposed to be gifts for my quilter friends… I guess they won’t have to worry about that anymore. I still need to make one for myself:)
    Untitled

    (fabric is Miss Kate and April Showers by Bonnie and Camille for Moda)

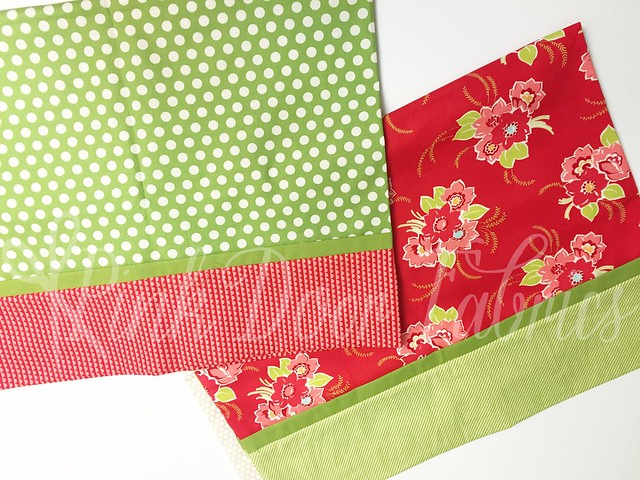
    This next gift is one I made for my kids. Following the tutorial by Missouri Star Quilt Company, I made new pillowcases. One of our Christmas Eve traditions is that my kids get a new set of pajamas and a new pillowcase. We also give them new slippers and a Christmas movie they get to stay up and watch before bed. Surprisingly, of all the gifts my kids have received, the pillowcases and pajamas are the ones they remember and talk about all year long!
    Untitled

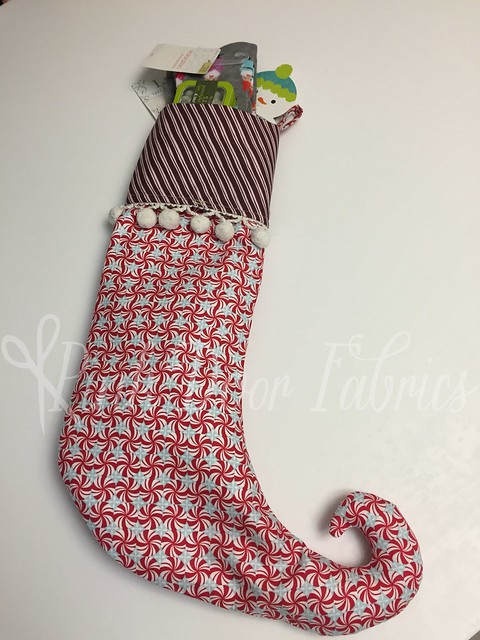
    And finally, I made this stocking using Lella Boutique’s Twinkle Toes pattern, which is available in the shop along with all the fabric and trim needed to make this project. I used an assortment of Christmas prints and knocked this out in under an hour! I thought it would be a cute hostess gift to fill a stocking with a bottle of wine or cider or some fun little treats.

    There you have it! There is still time to whip up a handmade Christmas for friends and family! Be sure to stop by the Pink Door shop if you need to pick up any supplies.

    Have a lovely holiday! Can’t wait to check in with you all in the new year; lots of exciting new fabric lines coming out and I’m hoping I can even sew with a few of them and not just stash as I’ve been doing since our baby was born.

    Blog Sig_Jamie


    2 Comments »

    07 Dec

    Holiday Quilt Labels [Free Download]

    Posted under 12 Days of Christmas, Holidays, News

    If you’re anything like me, you’re making a mad dash to finish up Christmas gifts in time. Am I right? I’ve got several quilts in progress, one needing photographed, and another needing binding. I also have a to-do list a mile long to prep some other gifts for my daughters and for family members. Can I get some elf help around here!?

    Anyway, enough rambling and whining, but I wanted to say, my favorite part of quilting, is the final touches. I love love love hand sewing a binding down. I love to add a quilt label to the back (or front) of quilt that of course, took me hours and hours to complete. It’s a nice little finishing touch to put some extra details down for the recipient. Like, who made it, when, and any little sentiment you’d like! I’ve found it difficult to located any that I loved though, so…

    We’ve created some quilt labels for all of you! It’s free download (just click on the image below), print them out on printable fabric or iron-on transfer paper, and you’re good to go! Follow the manufacturer’s directions for whatever material you’re printing on.

    Christmas_Quilt_Labels_PinkDoorFabrics-03

    We hope you enjoy these lovely quilt labels! Share what you’ve used them on by posting to Instagram and use #sewingwithpinkdoor, for a chance to win $25 at the beginning of each month!


    Have a lovely Holiday Season!

    Blog Sig_Sandra

    No Comments »